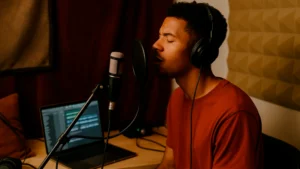
Why Session Organization Matters
Before we dive into the practical steps, here’s why it’s important:
- You save time during the recording process
- You avoid clicking around and breaking your flow
- You reduce the risk of losing takes or recording in the wrong track
- You improve your vocal editing and mixing later
If you treat every vocal recording like a professional session, you’ll sound like a pro much faster — no matter your gear.
Step 1: Start With a Template
Create a custom template in your DAW that you can open every time you want to record vocals. This should include:
- A lead vocal track
- At least 2 ad-lib tracks
- 2–4 backing vocal tracks (for doubles or harmonies)
- A reverb send, delay send, and basic effects chain
- Color-coded tracks for easy navigation
This alone will speed up your vocal recording workflow and reduce setup time by 80%.
Step 2: Name Your Tracks Clearly
Avoid default names like “Audio 1” or “Untitled.” Label your tracks with names like:
- “Lead Verse”
- “Hook Doubles”
- “Ad-libs”
- “BG Vox Left / Right”
It sounds obvious, but naming tracks properly will save your life when you come back to the session for edits or mixing. It’s a game-changer for clear vocal recording.
Step 3: Group Your Channels
Use group tracks or folders to organize your session visually. Common vocal groups:
- LEAD VOCALS
- BACKING VOCALS
- AD-LIBS
- EFFECTS
This makes volume balancing and processing easier later. It also helps you quickly solo or mute vocal sections while recording new takes.
Grouping = faster navigation = smoother vocal recording.
Step 4: Use Shortcuts and Markers
Most DAWs allow you to set markers or key commands. Use them to:
- Jump to the verse or chorus instantly
- Start recording from a specific bar
- Mute/unmute specific vocal groups
Keyboard shortcuts reduce mouse clicks — and help you stay in the zone while doing vocal recording.
Step 5: Use Takes and Playlists (Non-Destructive Recording)
If your DAW supports it (like Logic, Pro Tools, FL Studio, or Ableton), use take folders or playlists. This way you can:
- Record multiple takes without deleting anything
- Comp the best parts later
- Experiment without pressure
This is especially helpful for vocal recording when you’re trying different melodies or flows.
Bonus: Avoid These Common Mistakes
Here are a few things to avoid in your vocal recording session:
- Recording vocals straight onto the instrumental track
- Forgetting to turn off monitoring when stacking layers
- Not gain-staging your mic input before hitting record
- Leaving auto-tune or effects printed directly to the vocal track (unless intentional)
Remember: a clean setup = clean takes = better final mix.
Final Thoughts
Great vocal recording doesn’t start with a microphone — it starts with preparation.
By organizing your session, labeling tracks, using templates, and grouping channels, you’ll remove obstacles before they even show up. That means more time creating, less time clicking.
Get your session right — and your vocals will follow.
If you need a clean mix after a vocal recording session, check it out my mix and master service:
Click here